Reader setup
Before you start
Run each step in order and move only when the outcome is confirmed.
- A downloaded ViciBox 12 Standard or MultiDevice (MD) ISO, and a way to boot it, such as a physical disc, a USB drive, or a virtual machine's virtual drive
- Console access to the target server, since Phase 1 needs input before any network service is listening
- About 30 to 60 minutes for Phase 1 plus 15 to 30 minutes for Phase 2, and permission to erase whatever is currently on the target disk
- What you will prove
- A single ViciBox 12 server running Asterisk, MariaDB and the VICIdial web interface, reachable in a browser with the default account's password already changed.
- Safety boundary
- Phase 1 destroys every byte on the disk you select with no per-partition confirmation, and vicibox-express immediately reconfigures firewall, telephony and database services afterward. Never point either step at a server or disk holding data you still need.
Reader path
How to use this article
- Use it when: You need a fixed sequence to make a deployment or configuration change now.
- Expected result: Follow each step and verify the outcome before changing the next layer.
- Start here: Start at the first section and complete every checkpoint before moving to the next.
01 / 09
What ViciBox installs, and where this guide starts
Fast answer: download the matching ViciBox 12 ISO — an International Organization for Standardization disk image — boot it and let Phase 1 install the base operating system, work through the first-root-login wizard, then run Phase 2 with vicibox-express (or vicibox-install for a cluster), verify Asterisk and the web stack came up, open the web interface, and change the default password before anyone outside your network can reach the box.
This guide gets you to a login screen, not a dialing campaign — the carrier and campaign work happen in the articles this series points to at the end. If terms like agent, campaign, carrier or channel are new to you, VICIdial terminology for complete beginners: users, phones, campaigns and leads defines them once.
ViciBox 12 bundles openSUSE Leap 15.6 and Asterisk 18 with PJSIP (a SIP, meaning Session Initiation Protocol, channel driver library) support — both confirmed on our own ViciBox 12 lab — plus MariaDB and PHP at whatever point versions ViciBox's own documentation states for this release; point versions move between releases, so confirm yours rather than assuming ours. All of it is wired together by an installer that turns bare metal or a fresh virtual machine into a running VICIdial server in two phases. It replaces whatever is already on the target disk; it does not layer on top of an existing operating system.
- Confirm whether your server has one disk (Standard ISO) or two drives you want mirrored (MultiDevice ISO) before you download anything.
- Have direct console access ready, keyboard and monitor or your host's remote console, since Phase 1 needs input before any network service is listening.
- Decide now whether this is a single Express Box or the first node of a cluster; the two use different Phase 2 commands.
Visual walkthrough
Follow three real installer screens
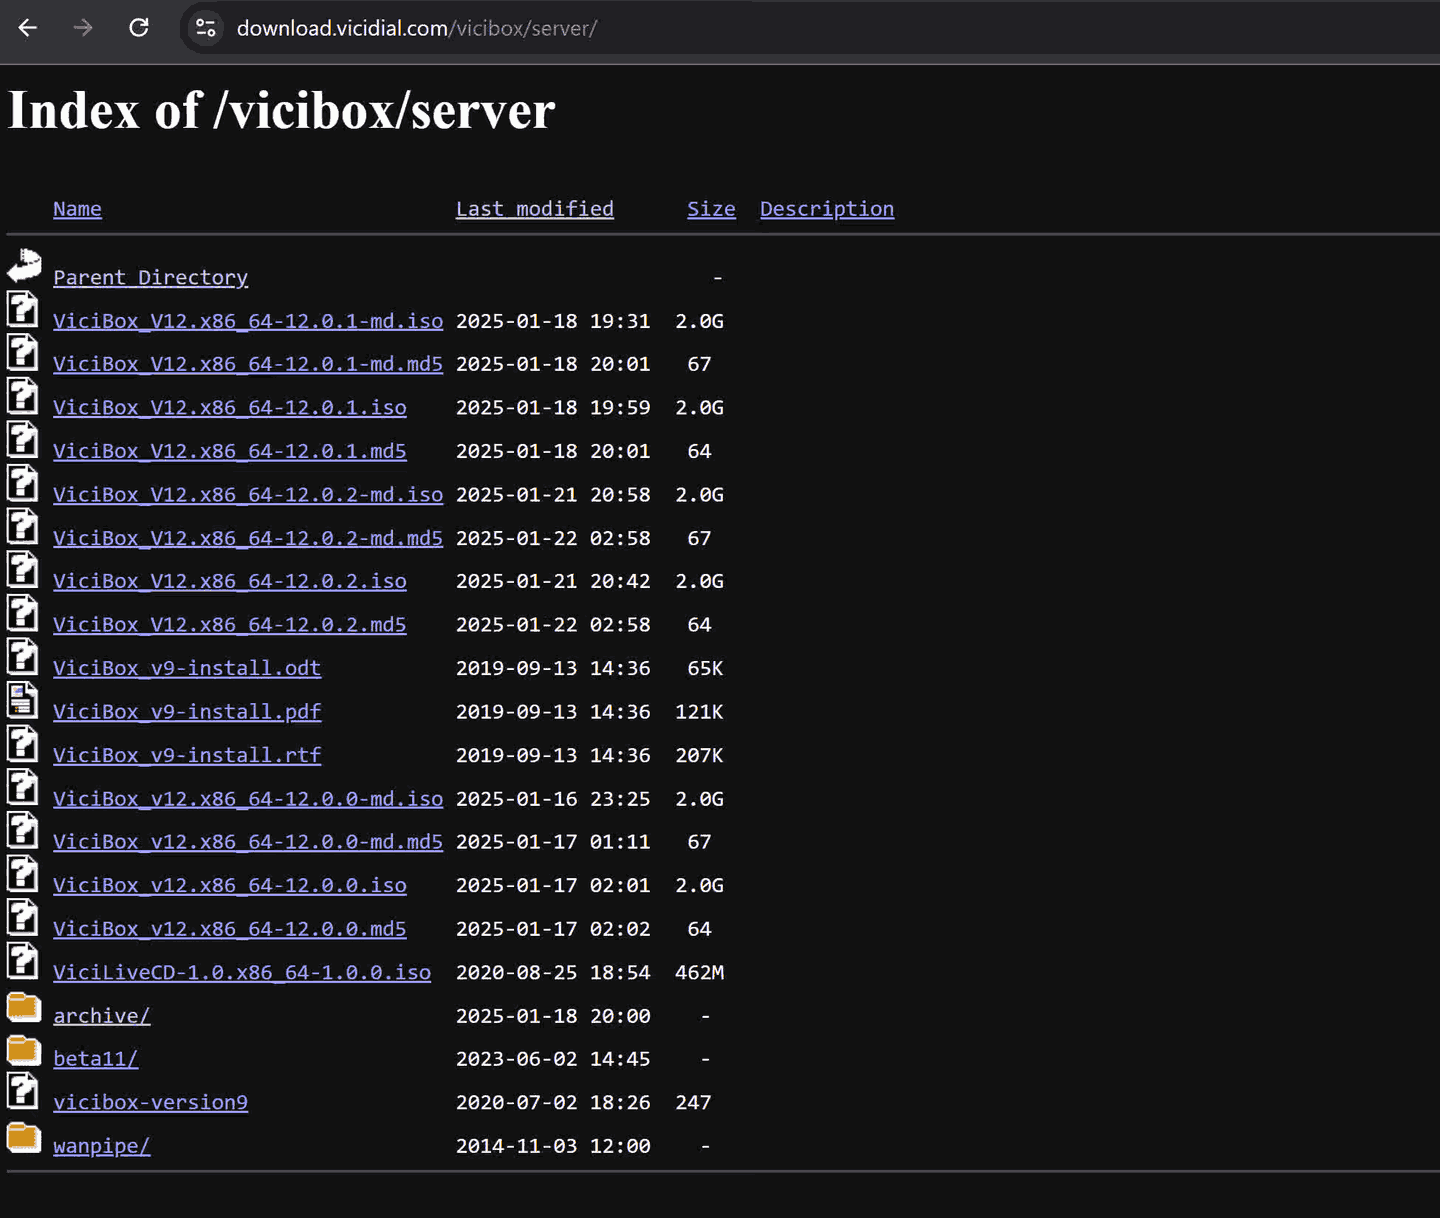
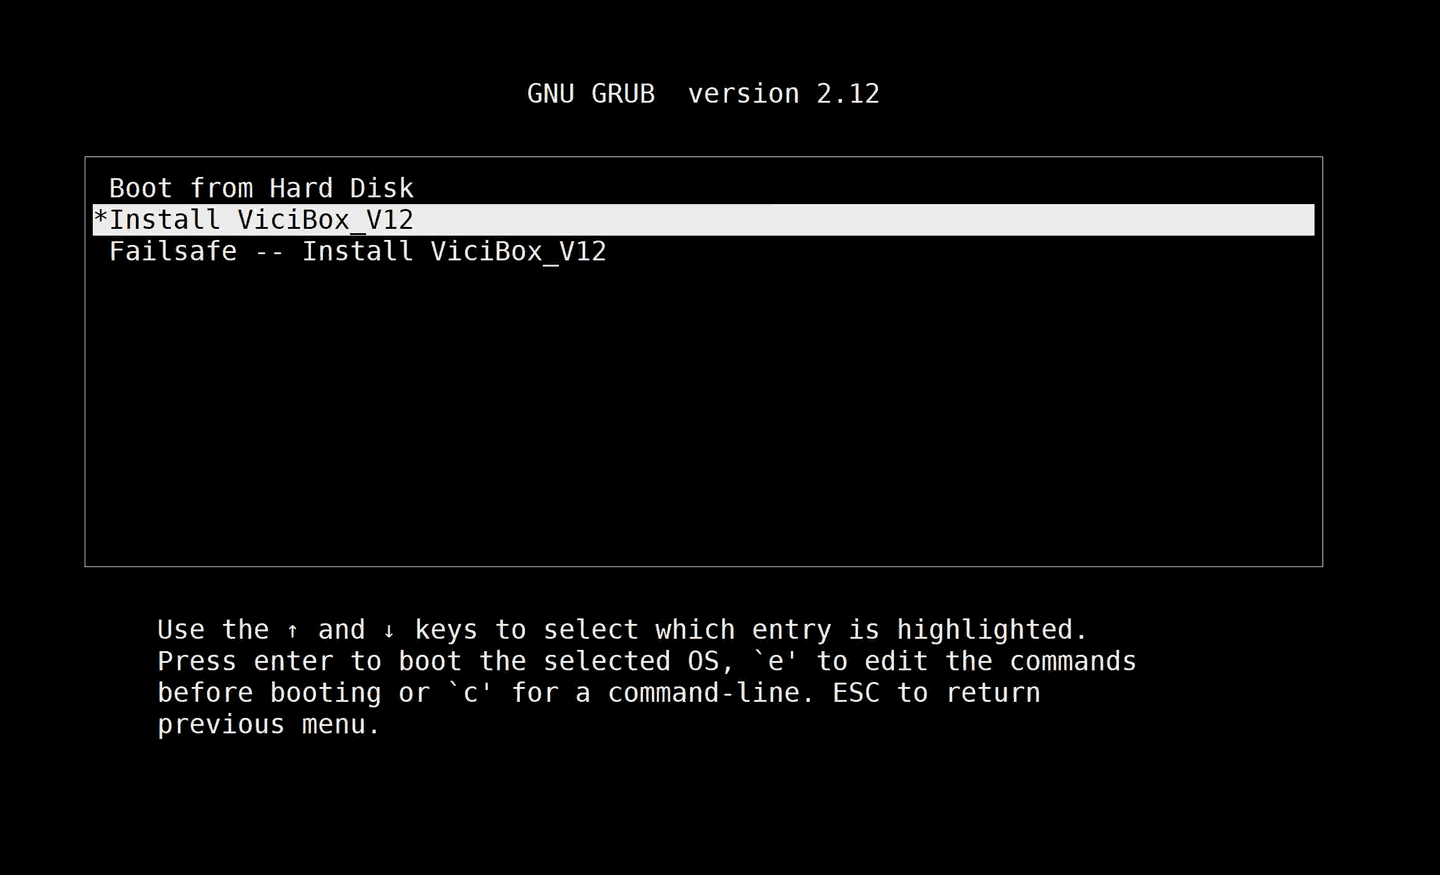
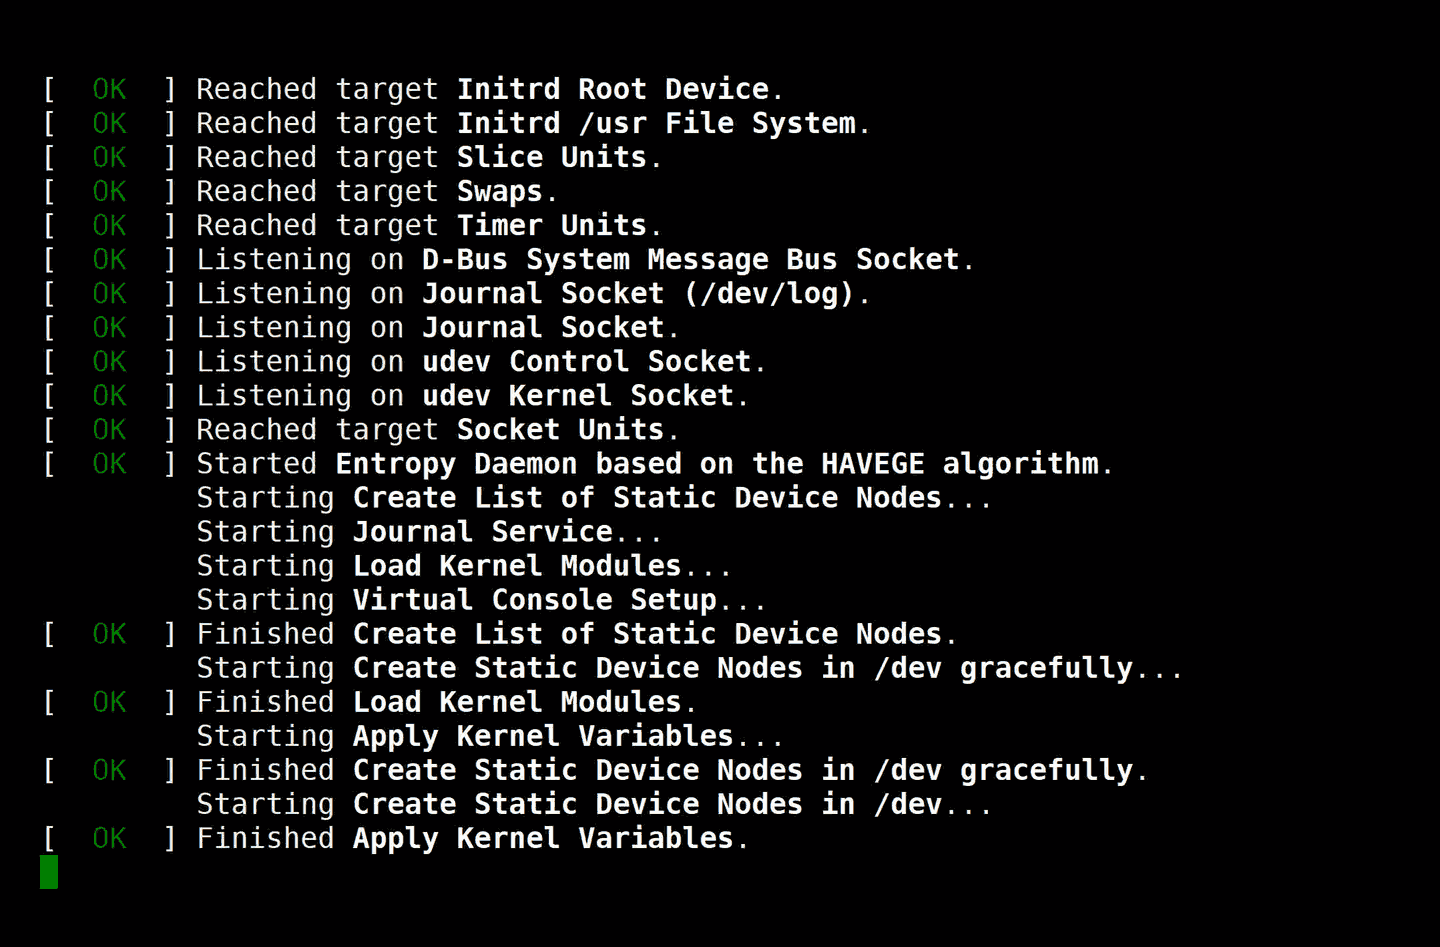
These three screens are real screenshots from the original vicigeek.com ViciBox install guide, not the isolated VICIdial demo used elsewhere on this site. Each caption states the date it was added to that guide, and every image helps you recognize a related screen; none proves that this article's exact command or result occurred on this build.Download the ViciBox 12 ISO
Choose Install ViciBox_V12 at GRUB
The installer boots its own environment
02 / 09
Choose your ISO flavor, and whether ViciBox fits your situation
ViciBox ships two ISO flavors. The Standard ISO targets a single disk, a hardware RAID (Redundant Array of Independent Disks) controller, or a virtual machine, so pick this unless you specifically need software-mirrored storage. The MultiDevice (MD) ISO instead builds a software RAID1 mirror across two drives during Phase 1, and only that flavor triggers the RAID setup step covered below. Both are published under download.vicidial.com/iso/vicibox/server/, and the same image can be written to a USB drive instead of a disc if your hardware boots from one.
ViciBox is a prebuilt, openSUSE-based appliance: you boot a vendor ISO, answer a short wizard, and the installer wires the operating system, Asterisk, MariaDB and the web stack together for you on the disk you select.
Pick the Standard ISO when you control a single disk, a hardware RAID controller, or a virtual machine; pick the MultiDevice ISO when you want a software RAID1 mirror across two drives from the first boot. For a from-scratch RHEL-family alternative, see the AlmaLinux 9/Rocky Linux 9 decision framework — this publication does not currently maintain a from-scratch Debian-family guide.
- Standard ISO for a single disk, a hardware RAID controller, or a virtual machine.
- MultiDevice (MD) ISO for two drives you want mirrored by software RAID1 during Phase 1.
- ViciBox when you control the physical hardware or hypervisor and want the vendor's own tested stack.
- For a from-scratch RHEL-family build instead, see the AlmaLinux 9/Rocky Linux 9 decision framework.
03 / 09
Step 1 — Boot the ISO and run Phase 1
Attach the ISO you chose above, a physical disc, a USB drive, or a virtual machine's virtual optical drive, and boot the server from it. At the boot menu, select Install ViciBox and press Enter.
The next screen lists every disk the installer can see; arrow down to the one you intend to use and press Enter. The confirmation dialog that follows destroys every byte on that disk the moment you accept it, there is no partition-by-partition review afterward, and no undo. Read the disk identifier twice before pressing Enter on Yes.
Once you confirm, the installer copies ViciBox onto that disk, then the machine reboots and continues from what it just wrote. A login prompt eventually appears showing the box's current network configuration; log in as root to move into the wizard covered in Step 2.
# Boot menu: highlight 'Install ViciBox', press Enter# Disk list: arrow keys to the target disk, press Enter## CONFIRMATION DIALOG (reads roughly):# All data on this disk will be destroyed. Continue?# Tab or arrow to 'Yes', press Enter -- this erases the disk right now## The installer copies ViciBox to disk and reboots automatically.# A login prompt with network details appears once it comes back up;# log in as root to continue into Step 2.This sample changes a system, contacts an outside service, needs a live call, or would print real data from a shared server, so it was not run on the demo. Run it only where you are authorized, and compare the result with the success and stop guidance.
- Before you run it
- Confirm you selected the correct disk before accepting the confirmation dialog; there is no second warning after this one.
- Success looks like
- The installer finishes copying, the server reboots on its own, and a login prompt showing network details appears.
- Stop if
- If the installer cannot see a disk, or reports a media error, stop before selecting anything; check cabling, controller mode and boot order rather than guessing at the disk list.
04 / 09
Step 2 — Complete the first-root-login wizard
Logging in as root for the first time launches a configuration wizard automatically; there is no way to reach a bare shell prompt without going through it. It runs in this order: localization, keyboard layout, a license you must review and accept by tabbing to Yes, timezone, then the root password, which it asks you to type twice.
After the password step, the wizard offers to install available updates; accept this on any box you plan to keep online. If you booted the MultiDevice (MD) ISO, a RAID setup step appears here too, since the software mirror is built during this wizard rather than later. The Standard ISO skips straight past that step.
Phase 1 is done once you see a root shell prompt showing your hostname, for example <HOSTNAME>:~ #. At that point, remove the install disc or USB drive and run reboot, so the machine comes back up from disk alone instead of booting the installer again by accident.
# Wizard order after first root login:# localization -> keyboard layout -> license review -> accept license (Tab to Yes)# -> timezone -> root password (entered twice) -> install updates# -> RAID setup (MultiDevice ISO only)## The wizard exits to a root shell prompt showing your hostname, for example:# <HOSTNAME>:~ # # Remove the install disc or USB drive now, then:rebootThis sample changes a system, contacts an outside service, needs a live call, or would print real data from a shared server, so it was not run on the demo. Run it only where you are authorized, and compare the result with the success and stop guidance.
- Before you run it
- Have the root password you want to standardize on ready before this step; you type it twice with no separate confirmation screen after.
- Success looks like
- The prompt shows your hostname, for example <HOSTNAME>:~ #, and the machine reboots cleanly once you remove the install media and run reboot.
- Stop if
- If the wizard hangs or rejects input on the license or keyboard screens, use arrow keys and Tab, not a mouse; this console wizard does not accept pointer input.
05 / 09
Step 3 — Run Phase 2 with vicibox-express (or vicibox-install for a cluster)
After the reboot, log in as root again at that same root shell prompt. For a single server carrying every VICIdial role, type vicibox-express and press Enter; when it asks for confirmation, type Y. The docs describe this path as best suited to contact centers with fewer than 20 agents, or a proof-of-concept build, and it installs the Admin, Agent and telephony roles together on that one machine.
If you are instead adding this server to a cluster, where the database, web and telephony roles live on separate boxes, run vicibox-install instead. It is an interactive installer that asks a series of questions to work out which role or roles this particular server should take on, rather than assuming all three belong together. Covering every vicibox-install cluster answer is outside this guide; treat vicibox-express as the beginner default and vicibox-install as the door into cluster deployments.
vicibox-express finishes with its own completion message; once you see it, run reboot again. This second reboot is what actually starts Asterisk, MariaDB and the web services in their normal startup order, rather than whatever state Phase 2 left them running in.
# Single server, every role (Admin + Agent + telephony):vicibox-express# When prompted, confirm with:Y # When vicibox-express reports it is finished:rebootThis sample changes a system, contacts an outside service, needs a live call, or would print real data from a shared server, so it was not run on the demo. Run it only where you are authorized, and compare the result with the success and stop guidance.
- Before you run it
- Run this only on a server that finished Phase 1 and rebooted to its root shell prompt. Do not run vicibox-express on a server you intend to add to a cluster later; use vicibox-install for that from the start.
- Success looks like
- vicibox-express reports it is finished and returns you to the prompt; the following reboot brings the machine back up with Asterisk, the database and the web server all configured.
- Stop if
- If vicibox-express exits with an error partway through, do not immediately rerun it. Note the last message it printed, confirm the server can still reach the internet, and only then decide whether to retry or reinstall Phase 1 from a clean disk.
06 / 09
Verify the stack actually came up
Log in once more after the reboot and confirm the telephony and process layer are actually running before you open a browser. screen -ls lists the background sessions VICIdial's own processes run inside; the docs note this can take up to five minutes to populate after a fresh Phase 2 install, so an empty or short list in the first few minutes does not mean anything is broken.
On this lab build, a fully started Express Box shows about a dozen screen sockets once every process registers — run screen -ls yourself rather than expecting an exact count. asterisk -rx 'core show uptime' asks the running Asterisk process for its uptime without opening a console; a real uptime line means Asterisk, the telephony engine holding open every channel, meaning every active call path, is running. If you want to look around interactively instead, asterisk -r opens Asterisk's console directly — the prompt shows your hostname, for example <HOSTNAME>*CLI> — type exit or press Ctrl+D to leave without stopping Asterisk.
Phase 2 also reconfigures the firewall as part of bringing the stack online; confirm that actually applied rather than assuming it. firewall-cmd --state should report running once vicibox-express has finished.
screen -ls# Wait up to 5 minutes after a fresh Phase 2 install if the list looks short asterisk -rx 'core show uptime'# A real uptime line means Asterisk is running; 'Unable to connect' means it is not firewall-cmd --state# Confirms Phase 2's firewall reconfiguration actually appliedCaptured demo response · 2026-09-24 22:25 UTC. The displayed command is the command that ran; a safe subset label means it was filtered, redacted, or fixture-scoped. Replays only after you select Replay transcript.
- Before you run it
- Run all three from a root shell after the post-Phase-2 reboot has finished.
- Success looks like
- screen -ls eventually lists about a dozen sockets, asterisk -rx 'core show uptime' returns a real uptime line, and firewall-cmd --state reports running.
- Stop if
- If screen -ls stays empty well past five minutes, asterisk -rx 'core show uptime' cannot connect, or firewall-cmd --state does not report running, do not move on to carrier or campaign work until each one is healthy.
07 / 09
Reach the web interface, then change the default password before anyone else can
Point a browser at the server's IP (Internet Protocol) address; 203.0.113.10 is used here only as a documentation placeholder, not a real box's address. ViciBox presents a small menu of roles at that address; choose Administration to reach the login screen.
The published default login is user 6666, password 1234. Those are vendor defaults documented in ViciBox's own installation guide, not a secret, which means anyone who has ever read that page, or this one, already knows them. Log in, and the docs walk you straight into VICIdial's own Initial Setup screen, where the recommended first move is granting the 6666 account full Admin permissions so it can actually configure the system.
Change that password before this server is reachable from the internet. Not after you finish initial setup, not after you add a carrier, before. If this box has any path in from the public internet, whether a forwarded port, a public IPv4 address, or a cloud provider's default-open firewall, 6666 and 1234 are a published credential pair that automated scanners try within hours of a port opening.
- Change the 6666 account's password immediately after your first successful login.
- Do this before opening any inbound port to this server, including the one you are using to reach the web interface right now.
- Grant the 6666 account Admin permissions only after the password is no longer the default.
- Treat 6666 and 1234 as public knowledge; never rely on that pair as a real credential past the first login.
08 / 09
Troubleshoot Phase 1 and Phase 2 failures, and know when to stop
Most Phase 1 failures show up as the installer refusing to see a disk, or the confirmation dialog listing a drive you did not expect. Stop and check cabling, controller firmware mode (AHCI versus RAID) and boot order before selecting a disk a second time; do not just pick a different entry in the list and hope.
If vicibox-express fails partway through Phase 2, rerunning it blindly is not a safe rollback move; the docs do not describe vicibox-express as safe to repeat against a partially applied state. Capture whatever error text is on screen, confirm the server can still reach the internet, since Phase 2 pulls packages, and only then decide whether to retry vicibox-express or reinstall Phase 1 from a clean disk.
If the web interface never loads, first confirm asterisk -rx 'core show uptime' and screen -ls both look healthy, per the previous section. A web failure alongside a healthy telephony layer points at the web server or the network path, not at VICIdial itself. If neither the Express path nor a fresh Phase 1 reinstall gets you a working login screen, stop and compare your ISO's checksum against the download page before you touch any configuration file by hand.
09 / 09
What's next, once you're past first login
A changed password gets you a secure login, not a dialing campaign. ViciBox's own Initial Setup screen assumes you already understand VICIdial's Admin menu; it does not walk you through what each screen is for.
If this is your first time inside a VICIdial Admin screen at all, the menu tour in Your first VICIdial login: find the Admin URL, Agent URL and default password covers the Users, User Groups, Campaigns, Lists, Scripts, Phones, Carriers and Reports menus. That tour now walks through this same ViciBox Express login, so its screens and credentials match what you just logged into.
From here: create a read-only database account for safe VICIdial queries before running any SQL sample elsewhere on this site, then connect a carrier so calls can actually leave the server, and build a first campaign, list and agent.
Evidence ledger
Verification basis
- Guide source: Phase 1 and Phase 2 express steps, prompts and exact commands are reproduced from ViciBox's own installation documentation.
- Verified on our ViciBox 12 lab: build v.12.0.2 240121, openSUSE Leap 15.6, VICIdial 2.14-952a, Asterisk 18.26.4-vici.
- Per ViciBox's own documentation, not independently confirmed on our lab: kernel version, and the exact MariaDB, PHP and Python point releases — these move between point releases, so confirm yours rather than assuming ours.
- Scope: vicibox-express installs the Admin, Agent and telephony roles on a single Express Box; the docs describe that path for contact centers under 20 agents or proof-of-concept builds, and point to vicibox-install for clusters instead.
- Boundary: this article stops at first login and the mandatory password change. It does not cover carrier setup, campaign creation, cluster role assignment or backup.
Primary references
Sources
- ViciBox Phase 1 installationViciBox · accessed August 5, 2026
- ViciBox Phase 2: Express Box installationViciBox · accessed August 5, 2026
- ViciBox installation overviewViciBox · accessed August 5, 2026
- ViciBox 12.0.2 release announcementVICIdial Forum · accessed August 5, 2026